How to Design a Pencil
Step 1:
Let’s start out by creating a new file. I used a 400×300 pixels canvas set at 72dpi, and I filled my background with a white colour. Now select the Line Tool, above your screen under the options palette choose Fill Pixels, set the weight to 10 px with anti-aliased checked. In a new layer draw a slanted line with #FBC219 color shade 82×137 px dimensions.
Step 2:
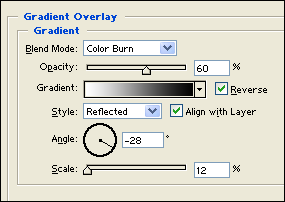
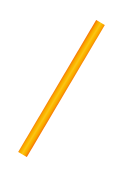
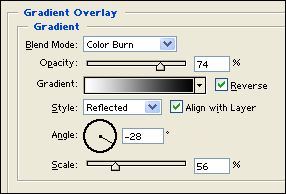
Under Layer Style(Layer > Layer Style) add a Gradient Overlay blending option to your line layer. If your results doesn’t look like the design below, play with the scale and angle settings.
Step 3:
Select the Pen Tool, above your screen under the options palette select Paths from the options. Create a new layer and draw the tip of the pencil design with #D7C1B6 colour shade and 15×18 px dimensions.
Step 4:
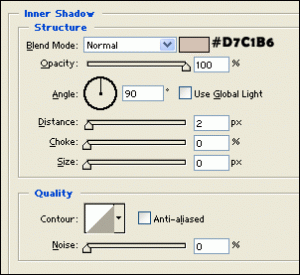
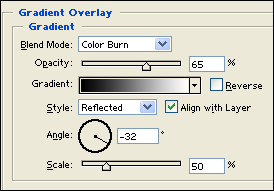
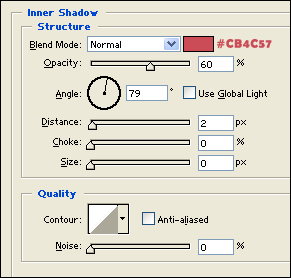
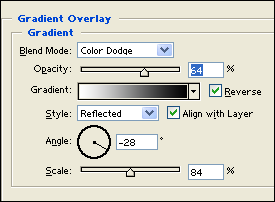
Under Layer Style(Layer > Layer Style) add an Inner Shadow and Gradient Overlay blending options to your pencil tip shape layer.
Step 5:
Using your Line Tool draw another 10 px slanted line with13 x 11 px dimensions and #F3F3FD colour shade on top of the pencil’s body.
Step 6:
Under Layer Style(Layer > Layer Style) add a Gradient Overlay blending option to your light grey slanted line layer.
Step 7:
Using your Line Tool draw another 10 px slanted line with #CB4C57 colour shade on top of the metal piece on the pencil. Then erase the edge of the slanted line so its curve at the top like a used eraser.
Step 8:
Under Layer Style(Layer > Layer Style) add an Inner Shadow and Gradient Overlay blending options to your eraser layer. If your results doesn’t look like the design below, play with the scale and angle settings.
Step 9:
In a new layer draw a lead shape design with #4E4E4E colour shade on the bottom of your pencil.






Leave a Reply